Friday, December 31, 2010

Welcome back and spaghetti squash recipe

Happy New Year, readers!

Sorry for the long break. You know, post-holiday chill.

JUST KIDDING.

Post-holidays extended hours at work. 10 and 11 hour workdays, one on top of the other. I went hoarse from giving so many belay lessons, started getting sick, and my nose piercing is very irritated from the increased dust inhalation. BUT, I have New Year's Eve and New Years Day off! Rest!

Per usual, my kitchen got TRICKED OUT this holiday. Other things as well.

From my sister, the Babycakes cookbook! I've drooled over this cookbook for ages, and finally I will get to make the delicious snacks revealed within.


She also got me a new kickass bonnet.


For those of you who know me, you know I have many, many hats.

Wine. Distilled unicorn tears.


Mitten mittens.


Mom and dad got me all sorts of nice little tools for the cooking trade to keep me thoroughly busy in the kitchen (Immersion blender! Soup!). I'm quite excited about all of it.

ANYWAYS, HOW ABOUT A RECIPE?


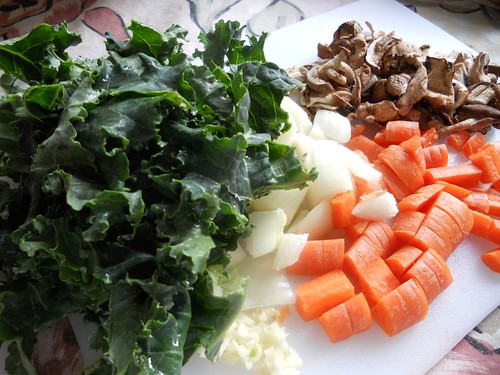
I came across this recipe when I was trying to decide what to make with my spaghetti squash. I altered it slightly to suit my tastes and my kitchen's inventory. Time to break out the frozen summer goodies!

For the sauce:
1/4 cup olive oil
2 cloves garlic
2/3 cup chopped bell peppers of any and all colors
1 1/2 T water
1 roasted red bell pepper, chopped
Salt to taste
1 tsp oregano
1/2 tsp lemon pepper
2-3 T nutritional yeast

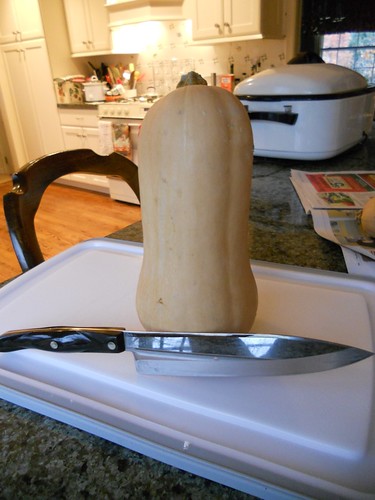
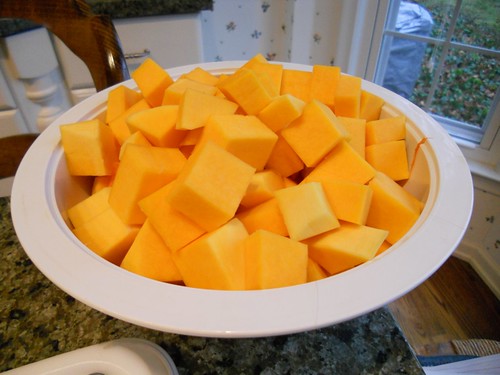
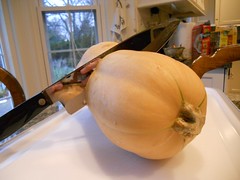
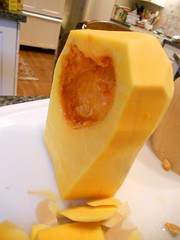
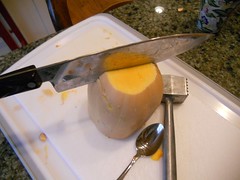
I prepared my spaghetti squash using the microwave method: Cut in half, place face-down in a dish with some water, cook 10-15 minutes, or until al dente. I scraped it out and put it in a dish.

For the sauce, I began heating the olive oil over medium-low heat, and tossed in the garlic. As the cited recipe suggests, don't cook over too high of heat, as you don't want the garlic to brown or burn. After a minute or so, I added in the peppers. I'm suggesting an addition of 1 1/2 Tablespoons of water because my peppers were frozen from the summer farmer's markets, and as they defrosted some liquid was added to the pan. If you are also using frozen veggies, ignore the addition of water! At this point, I also turned up the heat slightly.
After several minutes, I then added the roasted bell peppers to the mix. Mix in the oregano, salt, and lemon pepper. Cook for a minute or two more, and finally mix in the nutritional yeast. I put on 2 tablespoons here. After pouring the sauce over my squash "noodles" and mixing, I gave it a taste test, and decided I was desiring a bit more nutritional yeast, so I put on another 1/2 tablespoon or more. Done!

Delicious! I had it with some vegan Italian sausage, the recipe from Vegan Brunch.


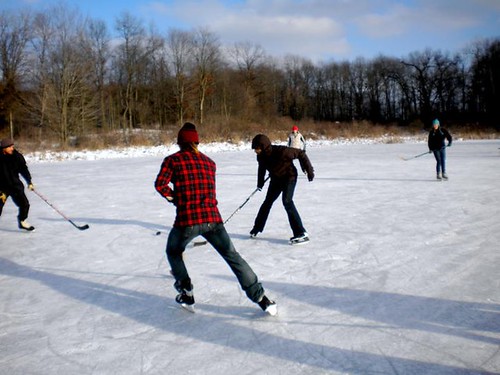
As for those vegan poptarts I discussed earlier, they were a delicious addition to my trip. The trip, however, ended unfortunately early.

Yay! Fun! Carefree!


SHIT!


We then drove home through sleet storms for 13 hours. So it goes.

Monday, December 20, 2010

Veggie Fried Rice and Pond Hockey

Dear friends,

Other food bloggers are frantically baking lots and lots of cookies, crafting homemade granola and busting out long-canned jars of tomatoes for holiday gifts. DIY crafts and holiday cocktail parties* dot the blogscape, but here at Oops!, we're pursuing way more interesting and fun ways of passing the time - POND HOCKEY.

kennyaction

Two weeks of below-freezing temps created the perfect rink upon which the 2010-2011 Frog Holler Pond Hockey season opener was played on Saturday. Skates were laced and fists were thrown, but a fine time was had by all.

Post-game snacks were also had by all! Here, our pal JJ prepares chestnuts, to be roasted over an open fire:

chestnuts

And our butternut-squash curry was re-created over a wood stove:

oopsteamcooking

(Beerdsmith's vacant look can be attributed to post-medical school final exams exhaustion...don't fret, the curry revived him!)

The weekend was fun, but alas, too short. Back to the office this morning, but what vegan meal did I cook up for lunch? A veggie-packed bowl of fried rice. Just because I'm not baking Christmas cookies doesn't mean I'm not eating them - in large quantities - at work. I felt the need to detox, and stuffing as many vegetables as I had on hand into the skillet seemed like the right way to do it.

DSCN0066

Monday Afternoon's Veggie Fried Rice

1 1/2 cups leftover brown rice, cooked
1 onion, chopped
2 cloves garlic, minced
1 carrot, chopped
1 bunch kale, chopped
1/2 cup shiitake mushrooms, chopped
1 tablespoon miso paste
1-2 tablespoons soy sauce
1-2 teaspoons sesame oil
juice of 1/2 lemon

Begin by heating some extra-virgin olive oil in a large skillet. Add the chopped onions and carrot, stir, and let cook until they begin to soften. Add the chopped garlic and cook for a couple more minutes. Add the mushrooms and a splash of soy sauce - this helps steam the shrooms and lets them cook down a little bit. While things are cooking, scoop a tablespoon or so of miso paste into a separate bowl. Whisk another splash of soy sauce and maybe a bit of water into the paste until it thins a little bit. Add the chopped kale to the pan, then pour the miso over the whole thing and stir until the vegetables are coated. Let everything hang out for a bit in the pan. When the veggies seem almost, but not quite, cooked down to your preferred level of doneness, add the rice and the lemon juice to the pan. Cook until the rice is heated through, then finish with a drizzle of sesame oil. Taste, adjust the seasonings, and eat.

groupaction


*Pancake and I have been talking about throwing a cocktail party for weeks now, but are afraid that, much like our other failed attempts to socialize with the outside world, no one will show up.

Friday, December 17, 2010

I'm still not packed.


In just a few hours I will be on my way to Chattanooga, TN for a little rocks climbing with my pals. There is ONE HIGHLY NECESSARY component to all climbing trips:

POPTARTS.

In the morning, when I'm sore and hungry and don't know how I can carry on, all I want is a fucking poptart. Yes, those strange, flat pastries with the gooey fruit middle that stick to the most absurdly hard to reach corners of your mouth, and therefore must always be eaten with about three tall glasses of water. And vegans need not feel left out, here. You, like me, can make your poptarts at home. How? See here. I didn't follow the recipe to a T, and nor should you, because we should all try to be god damn individuals every once in a while, right? I filled mine with my homemade and home-canned apple butter, and instead of mixing jam into the icing I mixed in maple syrup.

Okay, okay, now for the original part of the post.

Chocolate Chip Ridden Almond Kakor (ie CCRAK) (Kakor=Cookies)

INGREEDZ:
1/2 cup salted, roasted almonds
1/2 cup chocolate chips
1/2 cup coconut flour
2 cups white whole wheat flour
3/4 tsp baking soda
1/2 tsp salt
3/4 cup brown sugar
1/2 cup white sugar
1 cup oil
1/2 cup soymilk
1 tsp baking powder
2 T water
1 tsp vanilla

Preheat oven to 375.
Grind up the almonds and chocolate chips together in a food processor. Don't have a food processor? What the hell is wrong with you? You're a vegan. Get one. Stop processing before the mixture starts turning nut buttery. You just want small chunks.
In a small bowl, combine the flours, baking soda, and salt. In a large bowl, combine sugars, oil, soymilk, baking powder, water, and vanilla. Gradually mix the dry ingredients into the wet ones. If the mixture seems to dry, add a bit more oil and/or soymilk. Finally, add in your chopped up almonds and chocolate. Mix well. Put generous tablespoon full on a prepared cookie sheet, and press down with a fork to flatten. Bake 10-12 minutes.

The end.

Tuesday, December 14, 2010

Monday, December 13, 2010

Make a new friend.

It's the holidays.

Want to do something grand?

Go adopt a new friend from the local shelter. Some of them have been there for a long, long time. And they're so NICE!

For those of you in Washtenaw county and near...

Humane Society of Huron Valley

Keep in mind that black pets and Pit Bulls don't get homes as quickly. Why? Because of false social stigmas.

Friday, December 10, 2010

BROWINE SCAPES

DSCN0058

Go here and follow the instructions exactly. Except add dried cherries and you're ALL SET.

Monday, December 6, 2010

Butternut Squash and Chickpea Curry

Xtina here. Remember when I showed you how I hack apart butternut squashes? I promised you results. And here they are!

I am emerging from a time of transition, but this recipe was there for me when I needed something easy, yet flavorful and nutritious. Easily created out of canned goods from the pantry (or the trunk of your car), it's a good one to have in your bag of culinary tricks.

DSCN0010

Butternut Squash and Chickpea Curry


1 large onion, peeled and chopped
3 cloves garlic, minced
a dash of cayenne pepper
1 medium butternut squash, peeled and cubed
2 cups fresh cauliflower, chopped
1 24oz can tomatoes
1 15oz can coconut milk
1 15oz can chickpeas, rinsed
2 tablespoons curry powder (more or less, to taste)
the juice of half a lemon or lime or orange
cilantro to garnish

Saute the onion in some olive oil over a medium heat source, in a deep skillet or pan. When the onion starts to soften, add the garlic, butternut squash, and chopped cauliflower, and stir. After a few more minutes, add little salt and pepper, and a dash of cayenne pepper if you like things spicy. Also add the curry powder, and stir. When the onions become translucent and the garlic is soft, but not yet brown, dump in the can of tomatoes, chickpeas, and coconut milk. Sprinkle in a touch more salt, and bring the whole thing to a simmer.

This is the kind of recipe where you taste often, and add as you see fit. Depending on the acidity of the tomatoes, sometimes I add tiny swirl of agave nectar to the pot. Sometimes I add a ton more curry powder, or a dash of soy sauce. Taste mindfully, and get creative!! The important thing is to trust your taste buds. If you think it needs something, it probably does.

I think I let this simmer for 30 minutes or so. About halfway through, squeeze in some citrus - I used half an orange, but lime is also really good here. The longer it goes, the more flavors have a chance to blend. If you're pressed for time, at least let it hang until the cauliflower and squash get tender. Garnish with cilantro, and you're all set! Serve over rice or couscous, or sop it up with a slice of good bread.
Once again, I'm here to report the results of a Kitchen Lab. There hasn't been any blogging for the past few days because I've been using cookbooks. On Saturday, the ol' mancandy made me dinner, and I used a cookbook to make a vegan pumpkin pie. I wound up making more pie filling than was required, and had probably something like 3/4 cup left. As the pumpkin I used came not from a can but from a lovely Michigan-grown gourd, it felt scandalous to throw out the leftovers. I decided that something simply MUST be done with them.

But what?


The answer took me some time to find, but I ultimately settled on pumpkin-filled chocolate cupcakes. The results were something less than beautiful, but they certainly are delicious and decadent. There are times when Kitchen Lab is a well thought-out process, where it is performed with scrupulous concentration. Then there are times where I just blunder my way through in order to get the damn thing done. That's what happened with these guys. It seems only appropriate that I share this recipe with you in the exact manner in which I created it.

The Ugly:


The Pretty:


Kitchen Lab Pumpkin Pie-Filled Chocolate Cupcakes

I preheated my oven to 375 degrees. In a large bowl, I mixed

1 1/2 cups whole wheat white flour
3/4 cup cocoa powder
1 Tbsp baking powder
1/2 tsp salt

In a small bowl, I mixed
2 Tbsp ground flax
3 Tbsp water

In the large bowl of dry ingredients, I made a well in the middle. In the well, I poured

1 cup sunflower oil
3/4 cup soymilk

I stirred this together. The batter was too clumpy, but it looked so chocolaty that I had to stick my finger in and lick some. Oops, I had forgotten to mix in sugar. Fuck! In an attempt to fix my error, I threw in 1 cup vegan cane sugar and 1/2 cup water. The consistency, and flavor, quickly improved. Finally, I mixed in the now globular flax. Realizing halfway through this that I didn't have cupcake liners, I spritzed a cupcake pan with coconut oil spray and put down a layer of batter in each tin. Over the bottom layer, I poured a very goopy dollop of pie filling, which immediately spread, thus indicating my cupcakes would be very much like a sandwich. I layered more batter on top. They were filled right to the brim of the cupcake pan, which I knew meant the tops would spread quite a bit. I didn't care. After taking the time to spread the chocolate on top over the pumpkin pie filling seeping up, I put them in the oven. Assuming that they would be tragic failures, I didn't really keep track of exact time and just checked on them here and there with a fork to see if they had cooked through. It probably took between 25 and 30 minutes, but I really can't be sure.


Anyways, they are DELICIOUS. Even if you don't have any leftover pumpkin pie filling, the chocolate part was stellar and you should give it a whirl. Do everything precisely wrong, the way I did, to guarantee success.

Wednesday, December 1, 2010

Hold on to your butts.

I'm really very excited to bring up several things to you readers today:
a)SNOW. Finally. God dammit.
b)Canoes
c)Bunnies
d)Sweet potato spread


All of these things happened this week. With a list like that, I think it's obvious that this has been a pleasant week so far. About a)I woke up tickled to see a gentle December 1st flurry. Anyone else? Anyone? Winter. Love it.

b)Canoeing (With inflatable canoe): Cheap, fun way to spend a few hours in nature's glory.


c)Bunnies: Today, doing some shelter cleaning at the Humane Society, I met a giant bunny named Marvin and a medium sized bunny named Ron Weasely. It was...swell.

And finally,

D)Sweet potato spread


Let me just say, holy shit is this delicious. I found the inspiration for this here. I lacked several ingredients that were mentioned, so I tinkered with it a bit and came to this delightfus rendition.

INGREEDZ:
1 1/2 average sized sweet potatoes, baked and mashed
1/2 cup tahini
1 clove of garlic
2-3 Tablespoons of freshly squeezed orange juice. That is, straight from an orange. Got it?
Pinch of salt
1/2 tsp ground ginger
1/4 tsp cloves
1/2 tsp cinnamon

The assembly is easy. After I pureed my sweet potatoes in my food processor, I simply threw all of the remaining ingredients in and processed until incorporated. I enjoyed this at work with some homemade naan bread, and intend to enjoy it in some other fashion this evening. On a sandwich, perhaps? Yet to be decided. It will be splendid, of this I have no doubt. No doubt at all.

Saturday, November 27, 2010

The King Stag

I'm making apple butter and canning it right now.

But more on that later.

For now, I wish to share with you a harrowing tale of how I, Pancake, became the savior of one Banana.

Arriving home at my parents dwelling in the suburbs of Detroit, I walked in the kitchen to find three bananas in the fruit bowl in various states of decay. Shocked, appalled, saddened, I made plans to somehow liberate them from their slow and useless deaths. Unfortunately, I knew that this would have to wait until the day after Thanksgiving, when I would have ample time. I am devastated to report that two of the bananas did not make it to that day.

But one did!

I took Banana into my gentle hands, and to the sink where in the natural light flowing through the windows it became abundantly clear that we couldn't save its leg (rather, the last inch and a half on one end), as it was black and a bit fuzzy. The rest of Banana was at prime ripeness for baking. We discussed options, and Banana settled on the following.

Giant Chocolate Chip Banana Cookie


Preheat oven to 350, and grease up a 9 inch diameter round cake pan.

INGREEDZ:
1 medium banana mashed (Banana was large, but having removed the end, I'd say medium)
1/2 cup vegan cane sugar
1/2 cup light brown sugar
3/4 cup safflower oil
2 cups flour
1/2 tsp baking soda
1/2 tsp salt
1 1/2 tsp baking powder
3 Tbsp water
A couple handfuls chocolate chips

In a large bowl, mix together the mashed banana, the sugar, and the oil until well combined. Sift in and mix the flour, baking soda, and salt. When this is all thoroughly incorporated, throw in the baking powder and the 3 tablespoons of water until everything comes together as a delicious cookie dough. Finally, mix in the chocolate chips to your taste. Spread the cookie dough evenly in the pan, and bake for about 30 minutes, or until top is brown and cookie seems cooked through. Allow to cool in the pan for some time before cutting, so you don't screw it up, CHUMP.

Proceed to mow down.

My dad really, really liked these.

May the force be with you, Banana.

Friday, November 26, 2010

How-To: Butternut Squash Tutorial

Fall fall fall. My favorite season. I'm told that a love of autumn is one sure sign that a person is from Michigan. We DO get glorious, glorious falls. And bevy of winter squash recipes flood the local food universe.

The autumn glory of the mitten-shaped state does, however, come with an expiration date. I'm not quite sure when that is, but eventually the leaves fall from the trees, the temperature nosedives and the sky becomes that slate gray overcast color for a seeming eternity. The sun sets at 5:03pm.

HOWEVER

Butternut squash recipes live on!

The Oops! team has spent the last couple months eating squash of all kinds. This year (along with years past), I've noticed that while many recipes featuring butternut squash exist everywhere, almost all of them start with something similar to this:

"3 cups butternut squash, peeled and cut into 1-inch chunks."

I used to read sentences like this, then steal a glance at the large, bulbous, vaguely phallic vegetable sitting on the counter, and feel a creeping sense of dread. Fear. Anxiety. Feelings one should NEVER associate with a gift as delicious and healthful as the butternut squash.

Well, after a fall of practice, I finally feel confident hacking apart any butternut squash that comes my way. Here's how I go from this:

DSCN0032

to this:

DSCN0042

1. Assemble your tools. I use a big cutting board, a sharp knife, a kitchen mallet, a spoon and a bowl.

2. Laying the squash on its side, cut the sucker in half crosswise. Use the force, but safely. Depending on the size of the squash, I may or may not need to use a mallet to help drive my knife. This cut gives you two flat surfaces that are nice and stable to work with.

DSCN0034

3. Take the bulbous end and set it flat-side-down on the cutting board. Chop the sucker in half.

DSCN0035

4. Using your spoon, scrape away the seeds and pulp and set aside to throw in the compost bin. Setting the squash on its flat side, carefully peel the squash using your knife. I think this is much easier than using a vegetable peeler.

DSCN0036

5. I like to clear the cutting board of peels as I go. Once you've cleaned up, set a peeled squash half on its flat side and cut into slices, then chunks. Be mindful of the stability of your slices - sometimes I try to stack too many slices at once, and they start to slip around. BETTER SAFE THAN SORRY.

DSCN0038

6. Repeat with the other half of the bulb. You're halfway done!

7. Next, attack the top half of the squash. If you find your squash lacking in flat, stable sides to cut from, create your own! Show that squash who's holding the knife in this relationship!

DSCN0041

8. Peel, baby, peel.

9. Slice and chunk. Throw the chunks in a bowl. You're doing it!

10. You're done!!

DSCN0043

Remember, practice makes perfect. The more you try, the better you'll get and the more confidence you'll build. But what became of this squash featured here, you ask? Stay tuned...

Thursday, November 25, 2010

T-GIVES

Hey folks - Happy Thanksgiving!

I have mixed feelings about today's holiday. On the right hand, I think it's fabulous to have a holiday that's - theoretically - about gratitude. And food. Food and gratitude. Plus, I'm lucky enough to only have fond memories of Thanksgivings past with my family and loved ones. And mashed potatoes. Mashed potatoes are my loved ones.

On my left hand, however, I can't can't help but feel like the entire holiday is based on the fact that we Americans are merely thankful that the Indians taught us how to plant corn before we executed a mass genocide on their ethnic groups. Then genetically modified the shit out of their corn.

Not to mention, it's a little alienating to be the only vegetarian in a family of meat-embracers. It's hard for me to participate in a day based around the preparation and consumption of factory-produced meat and vegetables.

Maybe by holidays of the future, I'll have figured out a better way to balance these mixed feelings. As of right now, all I can do is created an epic vegan plate for myself, and look forward to creating new and more ethical holiday traditions in the future.

My fellow vegetarians and vegans, we have much to be thankful for. And today, a turkey is thanking you!

Saturday, November 20, 2010

400 babies

Today the gym was overrun by children of all ages. Children running. Children yelling. Children swinging Tarzan-style on ropes. Children in my ABC class.

There is, however, good news.

Today is a joyous day, as it marks the last 3-6 year-old climbing classes for the fall. After a massive birthday party this afternoon, I get to enjoy two weeks off before I have to start re-teaching those little heathens how to clip to ropes and climb up walls again. Bliss!

And to celebrate, cookies! Cookies! Celebrate!


Chocolate Chip Coconut Macadamia Shortbread

Ingreedz:
2/3 cup palm shortening, or vegetable shortening. Whatever.
1/2 cup powdered sugar
1/2 tsp vanilla
1/4 cup coconut flour
3/4 cup white whole wheat flour
1/4 tsp salt
1/4 tsp baking soda
Small handful each of:
Chocolate chips
Coconut flakes
Macadamia nuts

Preheat oven to 350. In a bowl, stir up the shortening so that it's nice and smooth. Not globby. Mix in the powdered sugar until well incorporated, and then the vanilla. In another bowl, mix together the flours, salt, and baking soda. Add them to the shortening bowl and mix together until you have a crumbly dough. You might have to use your hands, if you lack a mixer as I do. Finally, add in all the goodies and make sure they are mixed in thoroughly. Press into the bottom of a prepared 8in diameter circular pan, and throw in the oven. Bake until the top is lookin' golden brown (I think mine was in there around 20 minutes. Just check in on it!). Remove, and cool until set before attempting to cut it!

Friday, November 19, 2010

How to Survive in a Non-Vegan World

Some lessons I learned over the 4 days I was trapped in a conference center buried deep in terrifyingly paved big box store land 45 minutes outside Chicago:

1. Calling ahead to confirm the presence of vegan food means nothing. NOTHING. So you better come prepared. This means packing your own snacks - I brought a disgusting amount of curried cashews, a bag of trail mix, fruit leather, and two bars of chocolate. Note that I didn't include any fresh vegetables. This proved to be a mistake.

2. Befriend the waitstaff. They can - and will - hook you up with secret dishes from the kitchen. After a ten minute chat, I managed to score a plate of roasted vegetables and a cup of amazing lentil soup being served in the restaurant. I received more than a few dirty looks from my miserable veggie comrades as they forced down yet another bowl of mushy pasta from the buffet, but it was worth it.

3. When you're forced to have meals with 260 new people every single day, you better believe that someone is going to notice you're not eating the pork chops, and launch into the dreaded "are you a vegetarian? why??" song and dance. Practice your elevator speech - I've got mine down to a 30 second vegetarian manifesto. Try not to groan when they reply, "that's awesome, but I could NEVER give up cheese!!"

You will face unbelievable odds, but persevere anyway. Every time you step out of your comfort zone - in this case it was my comfy local and veggie food bubble - you learn something new. A good attitude goes a long way. Orange juice on your cereal is actually kind of good.

Thursday, November 18, 2010

Kitchen Lab turned Kitchen Success!

Folks!

For quite some time I've been interested in attempting to cook risotto. Yes, that glorious, creamy rice dish. The issue has been time, as risotto requires 20 minutes of undivided attention. I finally decided to get down to learning and experimenting.

Now, let me explain how things generally work with new kitchen challenges. They are often failures, and take repeated efforts. Typically, I write down the things I am doing while I make them, that way I can blog everything I did without having to pull from memory later. But when "Kitchen Lab" is the name of the game, I don't usually write anything down on the first go, as the chance of success is so minimal. I figure I'll just report on the process.

But today...today was an unexpected and delightful success. And I simply must share it.


Impossibly Vegan Creamy Winter Squash Risotto

Needs:
Your FAVORITE winter squash, or whatever you have on hand
1 large onion, chopped
2 1/2 T Earth Balance or other butter substitute
3 cups vegetable broth
1 cup arborio rice
Olive oil
1/3 cup dry white wine, ROOM TEMP
Salt
Black pepper
Garlic powder
Dried parsley

Begin.
First, I cooked up my winter squash (I used delicata, as that was simply what I had on hand) in the microwave. I just cut it in half, and laid it face down upon a plate. I then microwaved it until it was soft to touch (about 5 minutes. May be more for your squash). The squash was carved out and food processed until smooth.
Meanwhile, in a medium-sized pot I melted about 2 1/2 T of the Earth Balance, and then threw in the chopped onion to cook until translucent.
While my onions were cooking down, I divided my attention between them and preparing my vegetable broth. I have the cubes, so I mixed the appropriate amount in with my 3 cups of water and brought that to a simmer.
When the onions became translucent, I removed them from the pot using a slotted spoon, allowing the EB to drip back into the pot, before setting them aside in a bowl. With the onions cleared out, I was free to throw in my rice. As this point, I felt that their wasn't quite enough EB left at the bottom of the pot for this rice sautee, so I just drizzled a slight amount of olive oil on the top. This is when your constant attention will be needed up until the end. Stir the rice constantly, so it doesn't stick to the bottom, for about 6 or 7 minutes as the rice becomes a little translucent. Do NOT let it burn (I was on low-medium heat), as you don't want the outside of the rice to start flaking off. After this time elapsed, I poured in my room temperature white wine (IMPORTANT- Cold wine will shock the rice and crack the outside. NOOO!), and allowed it to evaporate. When it was mostly gone, I started to add the broth a ladle at a time.
This is when you start building that classic risotto creaminess. Allow the broth to cook down, but make sure to add the next ladle BEFORE the last is entirely evaporated. You never want the rice to dry out. Done appropriately, the rice should be al dante by the time you finish (or maybe just a bit on the soft side, depending on how you prefer it).
When the last ladle was added, I continued to cook the rice, but removed it from heat before all the broth was cooked away. At this point, it was looking nice and creamy. I added in my squash, which was about 3/4 cup, and stirred until all incorporated. I then added salt and pepper to my tastes, about 1/4-1/2 tsp or so granulated garlic, and a couple of sprinkles of the dried parsley. The results were FANTASMIC. I wanted to just eat it all right then, even though I had prepared the dish for my dinner tonight at work. At least now I have something to look forward to!


My shaman friend Uncle Walter even came to the kitchen to see what smelled so good.


I learned a lot about this dish by doing some research on the interblag. I googled risotto, and read through pages of suggestions. I'm generally not a fan of wikipedia, but I found the entry on risotto fascinating.

Coming up tomorrow, or maybe Saturday: What the HELL are the Oops! poverty corners?

Tuesday, November 16, 2010

When do cats hit terminal veloctiy?

Hello, friends.

I managed to keep my kitchen clean for 24 hours...up until now. I wasn't planning on cooking or baking anything today. I usually don't have much time on days that I work, since I work from 3-10 or 3-11 on the weekdays. That being said, it's nice to cram it in when I can because taking the creations to work for taste-testing is ideal. Climbers like snacks.


So I was initially just going to grocery shop, ride in the chill, and hammer out my winter work schedule before going in today...until I considered apples. Apples, which are good. Apples, which are delicious. I thought about putting them in things, on things, under things, through things...and then I freaked the fuck out and made THIS.


Now, there are problems with rushing recipes before work. Namely, that when you see potential problems in consistency, you say "Oh, fuck it, I'm gonna just roll with it!" No back-tracking. Back-tracking is a non-option. What I'm trying to say is, the structural integrity of this piece wasn't PERFECT. I mean, it wasn't horrible by any means. It definitely stayed to together very well. The center just collapsed a tiny bit. Really, I don't know why I'm complaining. It didn't turn out like your standard quick bread. In fact, it was kind of like a coffee cake to me. You know what? I'm going to call this a coffee cake. I have that right. All that matters is, it was DELIGHTFUS. I took it to work and it was scarfed down very rapidly, and all who dared to try it transcended to some greater state of being.


Cinnamon Apple...Coffee Cake? Thing.
Preheat oven to 350. Chop up your favorite flavor apple into small pieces.
In a small bowl, mix:
1 3/4 cup whole wheat white flour
1 T baking powder
1/2 tsp baking soda
1/2 tsp salt
1/4 tsp cloves
1 1/2 tsp cinnamon
3 T ground flaxseed

Set that aside. In a larger bowl, mix:
3/4 c light brown sugar
1/2 cup vegan cane sugar
1 cup safflower oil
1/2 cup soymilk

Add the dry ingredients to the wet ingredients and stir to combine. Mix in about 2/3 cup chopped apple. Spread in your standard bread pan, and throw in the oven. Meanwhile, mix in a small bowl:
3 T melted vegan butter sub
3 T brown sugar
7 T flour
It should get crummy. I baked the coffee cake bread thing for about 45 minutes. With 15 or so minutes to go, I spread this little mix over the top to crisp up. Remove from the oven after the 45 minutes are up, and let it cool in the bread pan for quite some time before tipping it out to let it cool further. It wasn't what I had initially envisioned, but it turned into something glorious. Something I would want to serve with vegan ice cream and warm syrup. Or just plain. As it is.


TRY IT. TRY IT NOW.

Saturday, November 13, 2010

The pictures every Michigan parent has of their child.

Hiking. It's cheap fun. You don't need a lot of shit to go walk in the woods for a day.

Sleeping Bear and Traverse City